- Home
- Birthday Balloon Card
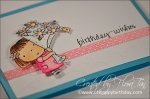
Birthday Balloon from One Girl to Another
Girl with Birthday balloon image hand stamped with Memento ink and coloured in using a blender pen and Memento colour markers.
The rubber stamp is from Magnolia Rubberstamps, a company in Sweden and the stamp used is YS11 Tilda with Balloon. It's quite an old design - came out in the year 2011 and I had it since then but have not used it. In fact, I have quite a number of their stamps and only used a few.
So it is time to take them out of storage and make some greeting cards with these cute pretty images.

A friend's daughter will be celebrating her birthday early next month so I thought I should make the little girl a pretty card to wish her Happy Birthday.
I have been wanting to use my collection of Magnolia rubber stamps for quite some time; years in fact but was too busy to dig them out of storage since I moved to my new apartment about three years ago.
The first image that came out of the box is this little girl named Tilda in a sweet lacy flock and ribbon in her long wavy hair. And she's carrying a birthday balloon in her hand. No Happy Birthday words on the balloon though.
So I took out a sheet of my 200gsm white card stock, Memento's Tuxedo Black ink pad and colour markers. The below image shown my stamped image including balloon only images. I was thinking of layering the balloon on top of the whole image but aborted it in the end.

Card Making Supplies for Birthday Balloon Card
- Tilda with Balloon rubber stamp from Magnolia
- 200gsm white card stock
- Basic folded 200gsm white card
- Memento Ink pad - Tuxedo Black colour
- Memento Dual Markers by Tsukineko
- Tombow blender pen (N00)
- A pair of scissors
- Double-sided foam tape
- Double-sided tape or glue
- Fine black marker (I used Pigma Micron 03)
Blender Pen Refill
If you blender pen gets rather dry; no longer wet and juicy, don't throw it away. Make your own blender pen refill.
Click here for the recipe and instructions on how to refill your pen.
Memento Dual Markers Used
- PM-100 Dandelion and PM-103 Cantaloupe for ribbon and dress
- PM-804 Desert Sand for skin
- PM-604 Summer Sky for sock and clouds
- PM-400 Rose Bud for cheeks and balloon
- PM-901 London Fog for hair and ground
- PM-801 Potter's Clay for boots
Steps to Creating the Birthday Balloon Card
Using the Blender Pen
Just touch the blender pen tip to the colour marker brush tip and apply the colour onto the stamped image. Start with a layer and go over where you want a stronger colour.
- Ink image and stamp onto white card.
- Colour with the respective coloured markers on the various area of the stamped image using the blender pen.
- Trim the coloured image closely to the edges.
- Use doubled-sided foam tape to attach to the front of the folded card leaving space on the right for the words.
- Ink and stamped the sentiments; 'enjoy...' and 'it's your Birthday' on the right of the image.
- Use the London Fog grey colour for the ground under Tilda's boots.
- Cut out two puffy cloud shapes and colour with Summer Sky colour.
- Glue the clouds with glue or double-sided tape to the top.
- Draw broken lines on the edges of the card front with a fine black marker.
Viola! A pretty Happy Birthday card for a sweet little princess who loves pink balloons and puffy clouds :-)

Share Your Thought About This Card
Facebook Comments...Add Yours!
About

Hi! I'm Flora Grace! :-) Welcome to my site for all things related to birthdays; birthday cards and invitations as well as birthday celebrations, party decoration ideas and more.
FREE Birthday News
Sign up! I'll send inspirations straight to your inbox. It's free!
Recent Articles
-
Oh Happy Birthday - Nobody Send Birthday Cards These Days! True?
May 28, 25 02:27 AM
 Oh Happy Birthday to you! You will never stop sending paper birthday cards if you know how something so small could impact a life so powerfully.
 -
Cool Birthday Cards for Friends
Apr 14, 21 05:07 AM
 These birthday cards for friends whether for guys or girlfriends are so cool and special. You could post them or proudly deliver by hands. Friends forever!
 -
DIY Gift Wrap for Personalised Birthday Gifts
Mar 09, 21 03:57 AM
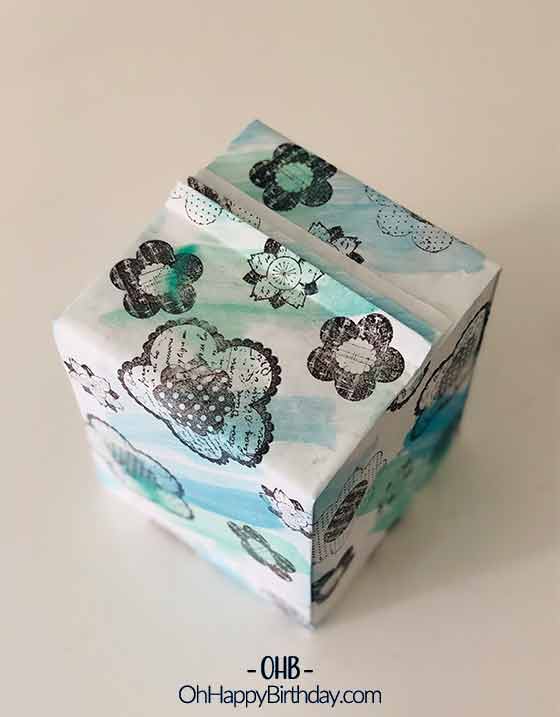 Make your own gift wrap using mahjong paper. Turn a plain sheet of white paper to a beautiful piece of wrapping paper for your birthday gift.
New! Comments
Please let me know what you think about this birthday card and/or article? Leave me a comment in the box below.